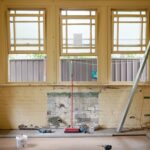
Discovering water damage in your home is an immediate call to action. Ignoring this situation can lead to catastrophic results that will compromise your property and safety. In the first 24 hours, you can take certain steps to not only contain the damage but also set the stage for effective recovery. The quicker you act, the better your chances of salvaging your belongings and minimizing repair costs. In this article, we’ll explore the ten essential steps you should consider in the crucial first 24 hours following water damage. The aim is to offer you a comprehensive guide that could save you time, money, and a lot of stress.
Assess the Situation: Safety Comes First
Before you even think about damage control, safety is the number one priority. A flooded home presents numerous risks, such as electrical shocks and structural collapses. If there’s standing water, make sure to turn off electricity at the main switch. Evaluate the structural integrity of your home. Look out for sagging ceilings, unstable flooring, and other signs that might indicate it’s not safe to be inside. If your initial evaluation shows that it’s risky to proceed, don’t hesitate to evacuate and wait for professionals to assess the situation.
Call a Professional Water Damage Restoration Company
While some minor cases of water damage can be a DIY fix, significant incidents usually require professional attention. Reputable water damage restoration specialists, such as Flood Pros USA, can offer services that include water extraction, dehumidification, mold remediation, and total restoration of affected areas. Take your time to research and choose a company that has a proven track record, as the quality of work can significantly affect the longevity of your home.
Identify the Source and Stop It
Your immediate objective should be identifying the source of the water problem. This can range from a burst pipe to a faulty washing machine or even natural causes like floods or storms. Knowing where the water is coming from helps you take targeted action to stop it. In cases of plumbing problems, knowing the location of the main water valve to turn off the supply can be a lifesaver. Once the source is identified and halted, you can breathe a small sigh of relief as you’ve stopped further water ingress.
Document the Damage for Insurance
This step is crucial for your insurance claim. Whip out your camera or smartphone and start taking clear, detailed photos and videos of all affected areas. You want to create a comprehensive visual record, capturing all angles and highlighting specific damages to flooring, walls, and personal items. The more detailed you are, the easier it will be to substantiate your insurance claim. Keep any damaged items, as the insurance adjuster may want to see them.
Contact Your Insurance Company
Once you have documented the damage, contact your insurance provider without delay. Initiating the claims process quickly will speed up the time it takes for you to get compensation and start repairs. Explain the situation clearly, ask what specific steps are required on your end, and ask how long the entire process is likely to take. The more information you can gather at this stage, the better prepared you’ll be for what comes next.
Remove Water and Start the Drying Process
In the meantime, you don’t have to sit idly by. You can start removing excess water using buckets, mops, and towels. Place fans strategically to help speed up the drying process, and if weather permits, open windows to increase ventilation. The idea is to dry out the area as much as possible before the professionals arrive, which can make their work easier and more effective.
Salvage What You Can
While the experts are on their way, start moving items that are still in good condition out of the affected area. Then, focus on what can be salvaged from the water-damaged zone. Non-porous items like plastic and metal are usually easier to save and disinfect. Soft, porous materials like fabrics may require specialized cleaning and should be assessed on a case-by-case basis.
Disinfect Affected Areas
Water damage often brings along unwanted guests like bacteria and mold. Cleaning and disinfecting affected areas are crucial steps to restore your home to a livable condition. Depending on the extent of the damage, you might need to go beyond household cleaners and use industrial-grade disinfectants. Always wear protective gear, including gloves and a mask, to protect yourself during this process.
Prevent Mold Growth
Mold can be your worst enemy after water damage. It can start growing within just 24 to 48 hours after exposure to moisture. Use dehumidifiers, fans, and good old sunshine, if possible, to dry out affected areas. Consider applying mold inhibitors to walls and floors or, better yet, consult with your chosen water damage restoration company for professional mold treatment options.
Plan for Repairs and Future Prevention
After you’ve successfully managed the immediate crisis, it’s time to look ahead. You’ll likely need substantial repair work, from replacing drywall and insulation to restoring electrical systems. Start by getting estimates from qualified contractors. Also, this is a good time to think about preventive measures like better plumbing, roof reinforcements, or sump pumps to protect against future incidents.
Conclusion
The first day after discovering water damage in your home is crucial for dictating how the rest of the recovery process will go. Swift, well-considered action can save you thousands of dollars and preserve the structural integrity of your home. From your immediate safety considerations to contacting professionals, each step has its importance. While it’s a stressful time, quick and effective action can significantly mitigate the negative impact. Keep this guide handy; you never know when you might need it, but you’ll be thankful to have it if you do.


